The human body consists of up to 75% water, so it’s no wonder we’re continually being reminded to drink more water, conserve water, and prevent water pollution. Water helps all of our primary biological systems function, from moisturizing our lungs to regulating body temperature.
Since water is so essential, it’s no wonder people have been finding ways to maintain healthy drinking water sources since the beginning of time. Since everyone now knows that plastic water bottles are bad for the planet, many people have switched to reusable water bottles to curb plastic waste. However, there are other ways to care for the planet from home that involve water consumption.
If being more eco-friendly is one of your goals, you may be interested in a solar water filter. Making a solar drinking water purifier at home isn’t as hard as you would think –– we put together a simple guide to show you just how easy it can be!

How do solar-powered purifiers work?
Sometimes it helps to know how something works before you attempt to assemble it. Solar water purifiers work by utilizing the sun’s energy to change contaminated water into freshwater — freshwater that is safe to drink. There are all kinds of solar-powered water purifiers on the market ranging from small filters that fit small containers for campers and hikers to large, commercial-style systems that provide whole villages with clean water.
What all solar-powered water purifiers have in common is that they collect water in a covered bin, and as the sunlight raises the temperature of the water, the water is vaporized and leaves the contaminants behind. The water condenses, and the drops collect into a channel that flows into the clean water bin.
What you’ll need
All of the items you need to build your own basic solar-powered water purifier should be available at your local hardware or big box stores.
- Wood or sheet metal to build an enclosure about the size of a microwave
- Reflective material like aluminum foil
- Black paint, the kind used for barbecue pits
- White foam insulation
- Sheet of glass
- Weather-resistant glue
- A catch trough
- A container for the clean water
- A heat-absorbent black tray
You will also need basic tools that you should have around if you are an experienced do-it-yourself-er. If not, you can pick up any of the missing tools at the hardware store. Most of them are reusable, and you will use them again in the future anyway, so it’s really a win-win!
- Paint bucket or tray and brush
- Caulk gun
- Plastic or metal trowel
If you’re building your own microwave-sized enclosure, you’ll need a few more tools:
- Hammer
- Power drill
- Screws and/or nails
- Tape measure
- Circular saw
Assembly
If you have DIY experience, this should be relatively simple. Beginners may have a harder time, but this project is totally doable if you take your time and plan. Before you begin the actual assembly, make sure you’re near where the system will end up, which will need to be near your water source. More on water sources later.
- Paint the exterior of the wood or metal enclosure with black barbecue paint. The black color will enhance the absorption of light from the sun.
- Glue the reflective surface onto the back and sidewalls of the box and glue foam insulation to the bottom of the enclosure.
- Put your tray of contaminated water inside the enclosure and place the sheet of glass on top.
- Arrange the catch trough at the bottom of the glass angled downward to a collection container (like a plastic or glass jug) to collect the purified water.
- Aim the whole contraption toward the sun and wait for the magic to happen.
Drink up
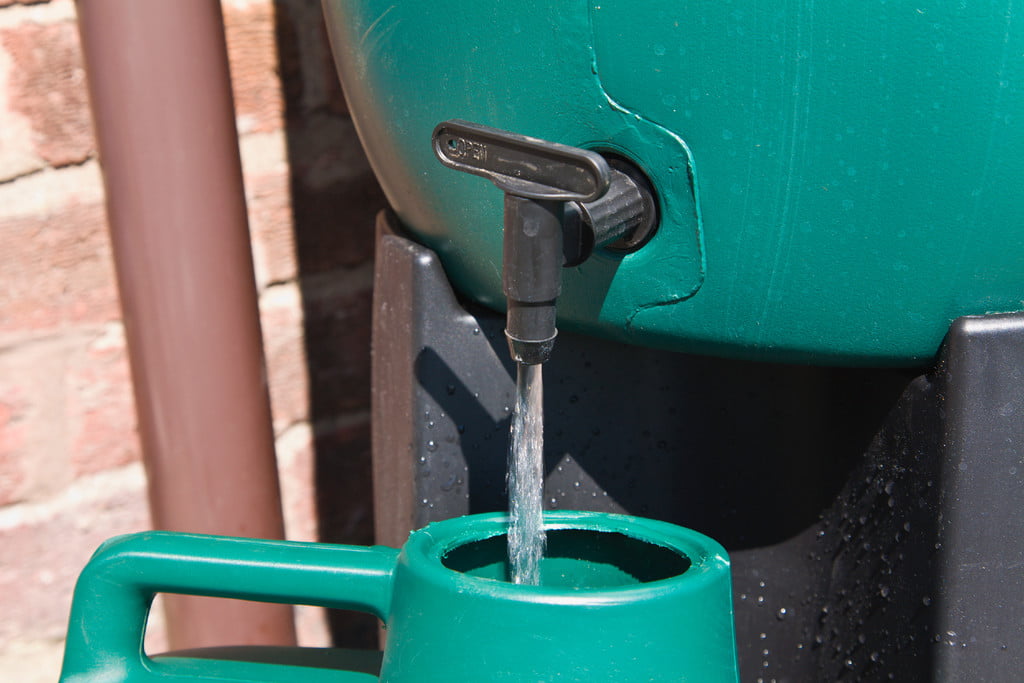
A solar-powered purification system the size of a microwave oven can yield up to 3 gallons of purified drinking water on a sunny day, but you have to supply it with water. For water even closer to nature, use a rain collection barrel to gather the water you want to purify in your new solar water filter.
If you happen to live by a creek or pond, you can certainly use that water in your water filter. You can use a bucket and schlep it over there if you want, or you can devise a system to get the water there on its own. The water collection method is up to you, but everyone knows that the easier the system is to use, the more often you will use it.
If you feel obligated to do your part in reducing your footprint, using solar power to purify water is an excellent way to help. You can DIY one with a few supplies and a little know-how, and it will be worth it with every glass of water you drink. Trust us.
Editors' Recommendations
- How to store coffee beans: 3 tips to keep your coffee fresh longer
- 33 easy and delicious recipes any man can make
- How to grill the steak of your dreams: An aspiring steak master’s guide
- How to make a Dark and Stormy, the rum-centric sibling of the Moscow Mule
- How to grill chicken correctly for a tender, delicious barbecue


