My clever hack makes any creamy soup recipe dairy-free (without sacrificing flavor)

Just because you're vegan or lactose intolerant doesn't mean you should miss out on the season's best soups

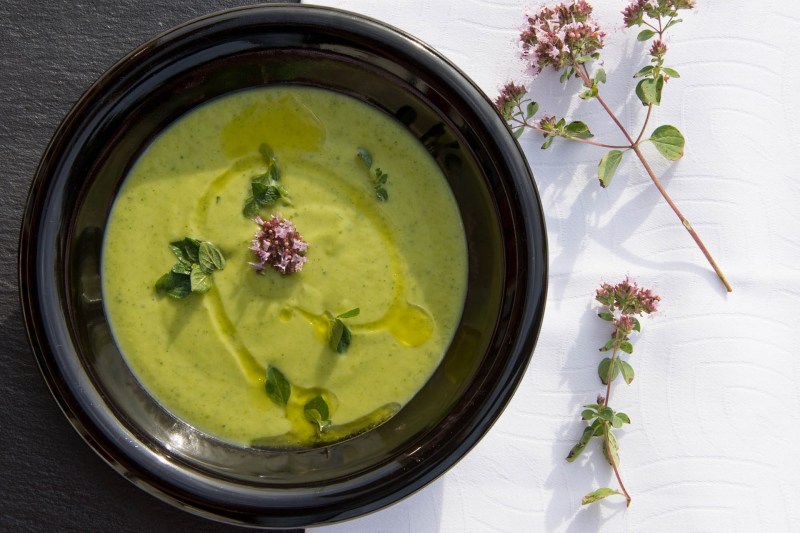
Broccoli soup
Saramukitza / Pixabay

The winter season is a favorite of many due to its festive cheer, twinkling lights, and the general spirit of loving merriment and goodwill. For us, it’s the soup. Deliciously warm and comforting winter soups are special in their ability to cheer, nourish, and warm both body and soul.

This time of year, we can’t get enough of our soup recipes. But as much as we adore these soups in all their cozy, velvety glory, they’re often thickened and flavored with lactose-laden cream and butter, sour creams, and cheeses. While these dairy ingredients do add tremendous flavor and depth to creamy soups, like what you’ll find in your potato soup recipe, they certainly aren’t for everyone. For a variety of reasons, many people can’t have dairy in their diets, and we’re here to help, at least when it comes to warm, creamy soups. There are actually several delicious ways for the vegan and dairy-intolerant individuals among us to achieve the same thick and creamy soup results with no dairy at all.

The secret ingredient to thick and silky dairy-free soups is starch. Depending on the flavors of your soup, you can use a huge variety of starchy ingredients to work as thickening agents in your dish. In fact, if what you’re making is a soup that features a particularly starchy ingredient already, like potatoes, simply add a little more potato and subtract a bit of the liquid for a naturally thick and creamy soup, thickened by the starchiness of the potatoes.

Bread is another one of our favorite options for thickening just about any of your favorites, like cream of broccoli soup, cream of mushroom soup, corn chowder, lobster bisque, and tomato soup. This method is tremendously popular in many European dishes, such as Italian ribollita. Rice and other grains like barley and oatmeal work very well, too. Simply allow them to cook within your soup, then puree with a regular or an immersion blender for a dairy-free soup that tastes just as delicious as the cream and butter version.

Garlic soup
Veronika FitArt / Unsplash

Roasted garlic soup recipe

This roasted garlic soup recipe is beautiful in its simplicity. The sweet, nutty flavor of roasted garlic shines in this delicious dairy-free soup that’s absolutely perfect for winter.

Ingredients

  • 8 cups chicken or vegetable stock
  • 4 tablespoons bacon fat (or vegetable oil)
  • 1 yellow onion, diced
  • 3 heads garlic, roasted (*see tips and tricks)
  • 1/2 cup dry white wine
  • 6-8 slices bread, diced into 1/2-inch pieces
  • Salt and pepper to taste

Method

  1. While the garlic is roasting (see below), heat the bacon fat or oil in a large pan over medium-high heat. Add the onion and saute it until it’s translucent, 2 to 3 minutes.
  2. Add the wine to the pan and cook it until it has nearly evaporated.
  3. Add the stock, roasted garlic, and bread cubes to the onions, stirring to combine.
  4. Bring the soup to a boil, then reduce to a simmer and cook on low-medium for 5 to 10 minutes.
  5. Remove the soup from the heat. Using an immersion blender, blend the soup until it’s velvety smooth.
  6. Season to taste and serve with homemade croutons or any other garnish you desire.

Roasted garlic soup tips and tricks

  • Roasted garlic is a very simple thing to prepare, and it is one of the most delicious ingredients in the world. Roasted garlic is incredible in thousands of dishes, taking on a sweeter, nuttier, smoother garlic taste than that of raw garlic. You can find our simple recipe for roasted garlic here.
  • Bread is a wonderful thickening agent, but it’s also great for adding and adapting flavor to your own personal preferences. You can use just about any kind of bread you like here, and keep in mind the additional flavors it will bring to a dish.

Editors' Recommendations

Lindsay Parrill
Lindsay is a graduate of California Culinary Academy, Le Cordon Bleu, San Francisco, from where she holds a degree in…
How to make food less salty: 5 easy fixes when you make this common cooking mistake
Don't toss it just yet, you can probably save it with...a potato?
Happy man adding salt while cooking for his friends in the kitchen.

Over-salting food is one of the most common culinary blunders, falling perhaps only just below one more common cooking crime - under-salting food. It's a finicky art, to be sure, and finding just the right balance can be tricky. After all, every palate is different, every dish unique, and recipes are often inconsistent. What does "season to taste" mean anyway, many wonder. While this term may be frustrating to those who prefer to follow a recipe down to the letter, it's really just a common phrase that means, "Everyone likes it differently, so just use your best judgment."
The problem with that mentality is that if you're new to cooking or really need to follow that recipe, mistakes can be made - often in the form of over-salting. After all, it's easy to get carried away when in chef mode, slicing and dicing away, fingers sinking into the briny granules inside the salt cellar, and dramatically raining the mineral down with skilled - albeit heavy-handed - expertise.
Over-salting food has gotten the better of us all, even those of us who are professionally trained, so there's no shame in the matter. Still, the mistake can be embarrassing and ruin all of your hard work in the kitchen. Nobody wants to spend hours lovingly preparing a meal only to be choking it down with a gallon of water because of a silly mistake.
If you're wondering how to make food less salty after you've already been too generous in your seasoning, there are some handy hacks you can use. So don't toss that dish just yet. Reach for one of these ingredients, and you'll be back on track in no time.

Acid

Read more
How to make hard apple cider from the comfort of your home
Hard apple cider in a glass, surrounded by apples.

As much as we like to talk about beer and how to brew it yourself, hard cider is equally delicious and a whole lot less complicated to make at home, requiring far less equipment. Indeed, making hard cider is a really a simple equation: Apple Juice + yeast + time = hard cider. Naturally, there's a bit more to it than this, and a few potential pitfalls you'll want to know about before you get started. Read on as we explain the ins and outs of how to make hard cider.
Hard cider is easy to DIY

From a broad perspective, learning how to make hard cider and then actually making it is quite straightforward. Yes, there might be tons of canned ciders for convenience, but nothing beats the taste of your own craft. You get yourself some fresh apple juice (either by mashing the apples yourself or buying pre-squeezed juice), add some yeast (Champagne yeast is a great choice), and then wait a few weeks for everything to ferment. Who knows? Maybe you'd be able to make your own cider cocktail next time. While there are some additional steps to making a great hard cider (which we'll get into below), this is the basic idea behind hard cider.
What you'll need to make hard cider

Read more
You’re probably making these 3 mistakes when you’re preparing baked chicken
Just say no to overcooked chicken
Roasted chicken

Baking chicken is one of those things that most homes probably do a few times a week. Chicken is delicious, crowd (and kid)-pleasing, generally pretty healthy, and usually simple enough when it comes to cooking. Whether you're roasting an entire bird for a group or just preparing a single baked chicken breast for one, there are a few mistakes we're all guilty of making from time to time. Mistakes that are easy to avoid if you know what to do. That's where we come in.

Starting with cold chicken
You may have heard this tip around Thanksgiving for roasting a perfect turkey (if not, take heed), but the same goes for pieces of chicken - and all other poultry and meats, in fact. We're all guilty - perhaps in a rush to get dinner on the table - of grabbing a protein out of the fridge and tossing it directly into the pot or pan in about as much time as it takes to get the package open. Look, we've all been there, but for the best-ever baked chicken, try to have a little more patience.

Read more