Who doesn’t love mouthwatering rib recipes? But there is an age-old question that needs to be answered if you don’t have a grill: Can you cook ribs in the oven? The answer is simple: Yes, you can. After all, you can use your oven for so much more than baking. You can cook bacon in the oven, cook ham in the oven, or even, yes, cook steak in the oven.
We used to think that ribs were only properly prepared if they were cooked in one of the best smokers or on the grill (sometimes first placed in a slow cooker), ideally over a long period of time. However, when circumstances (time constraints, lack of tools or space, etc.) don’t allow for these methods, you can cook some fall-off-the-bone ribs in a conventional oven.
Here’s how to cook ribs in the oven – what you need
Meat thermometer
When using an oven, you can’t raise or lower the cooking temperature as quickly as you can with a grill (although you can always pull the ribs out of the oven if they’re cooking too fast). If you use a meat thermometer to monitor cooking progress, you will lower the temperature in the oven each time you have to open the door. With a grill, on the other hand, cracking the lid or door usually releases only minimal heat. You will need to watch the clock closely, as you won’t be able to watch or physically check on the meat as easily.
Sauces
Want to nail that smoky flavor you get from barbecuing ribs? Nah, that ain’t gonna happen unless you use a smoke-flavored BBQ sauce or a dry rub. Reach for the liquid smoke or some preferred dry herb and spice blend with brown sugar and black pepper. You’ll also have to deal with grill purists telling you it’s wrong to bake ribs in the oven.
But wait till they nibble on the tender meat you’ve made. Who knows? Maybe they’ll change their mind. For now, let’s focus on how you can cook the most flavorful ribs in the oven. Put on your apron, fire up your oven, and let’s get to work.

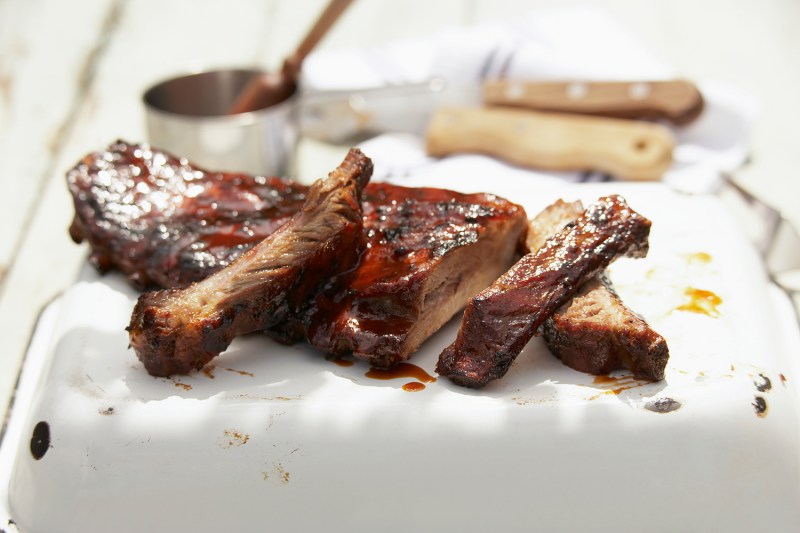
How to cook pork ribs in the oven
There are three basic ways to cook a rack of pork ribs in the oven:
- 4 hours at 250 degrees Fahrenheit
- 3 hours at 300 degrees Fahrenheit
- 2 hours at 350 degrees Fahrenheit
We’re not being flippant, by the way — that’s really all there is to oven-baked pork ribs that will be safe to eat. An internal temperature of 145 degrees Fahrenheit is the minimum, but at around 190 degrees Fahrenheit, the fat and collagen start to melt, producing a better-tasting rib. You just have to make sure you check on the ribs partway through the bake and then about a half-hour before the end, as you don’t want to overcook and toughen up the meat. (For the record, we used good ol’ Trader Joe’s ribs — they won’t hurt your bank account, and they still taste great.)
Now, let’s go through an actual recipe step by step, using the 3-hour, 300-degree, down-the-middle approach.
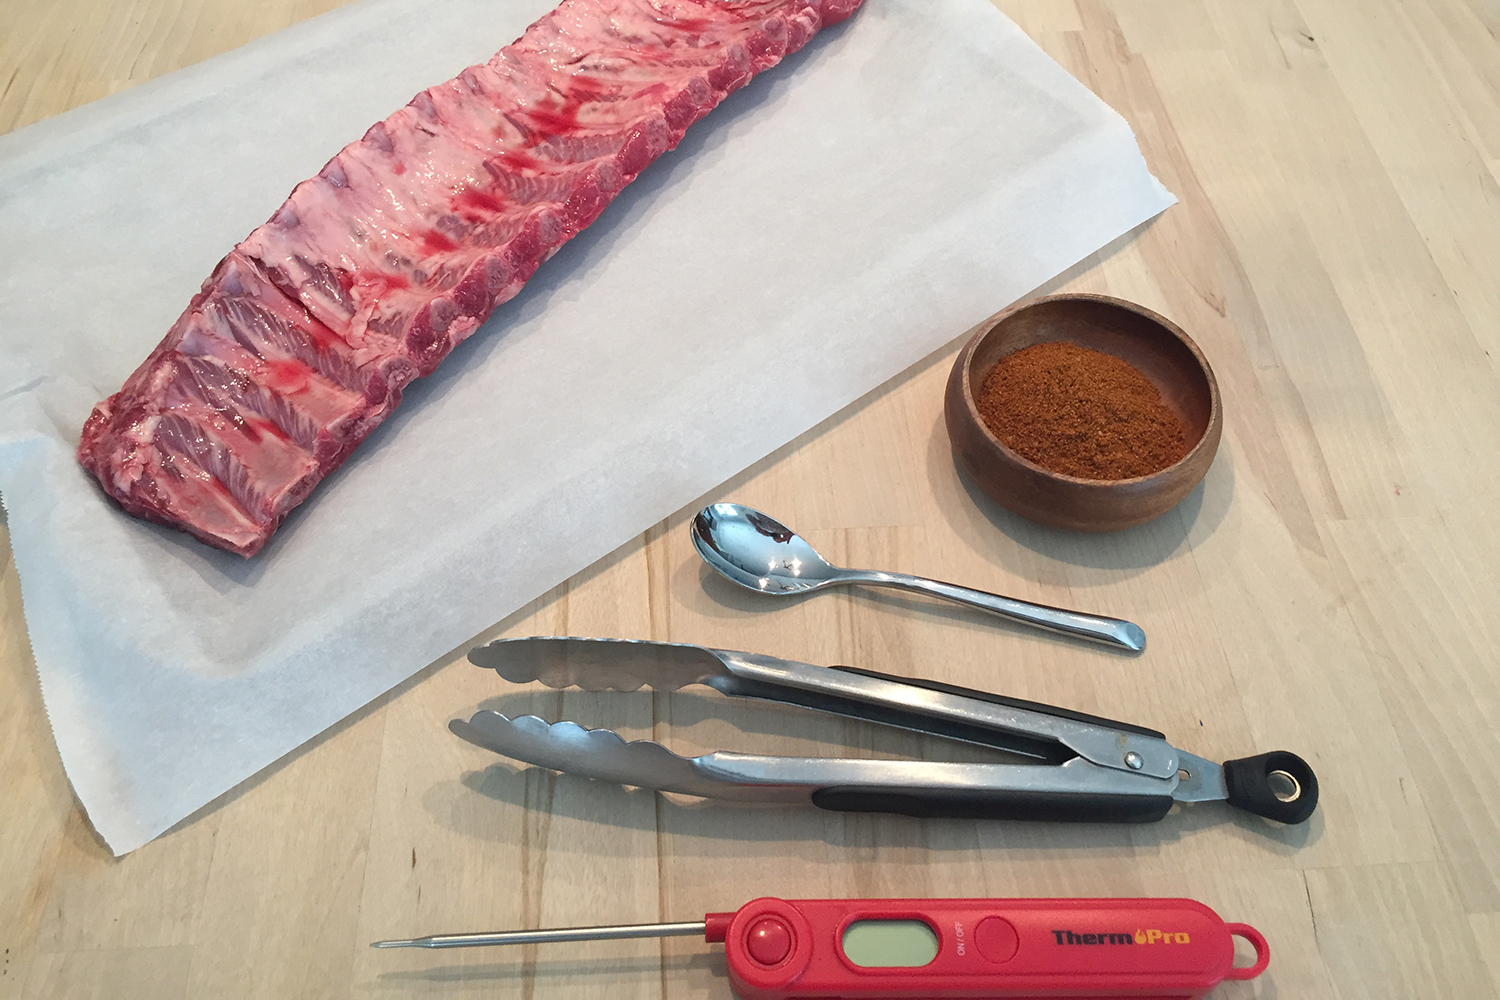
Ingredients:
- 1 rack of pork baby back ribs, raw and at room temp
- Approximately 1 cup of dry rub
- Approximately 1 cup of quality barbecue sauce
- 5 tablespoons of honey Dijon mustard
- 1 tablespoon of liquid smoke (optional)
Method:
- Preheat oven to 300 Fahrenheit.
- Line a baking sheet with foil or parchment paper.
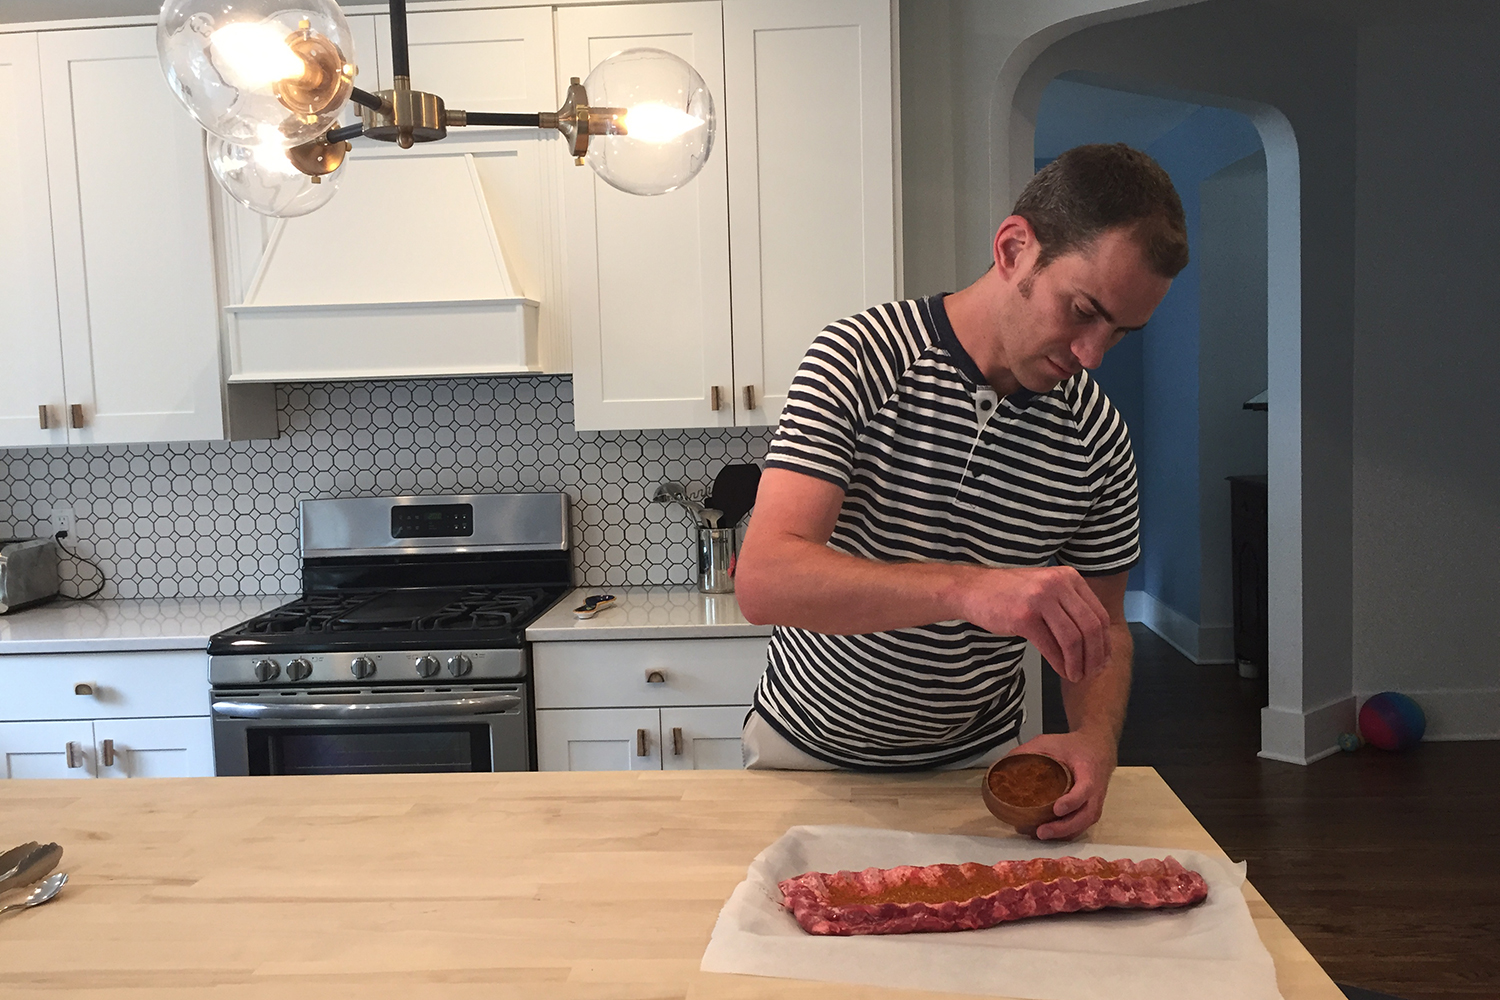
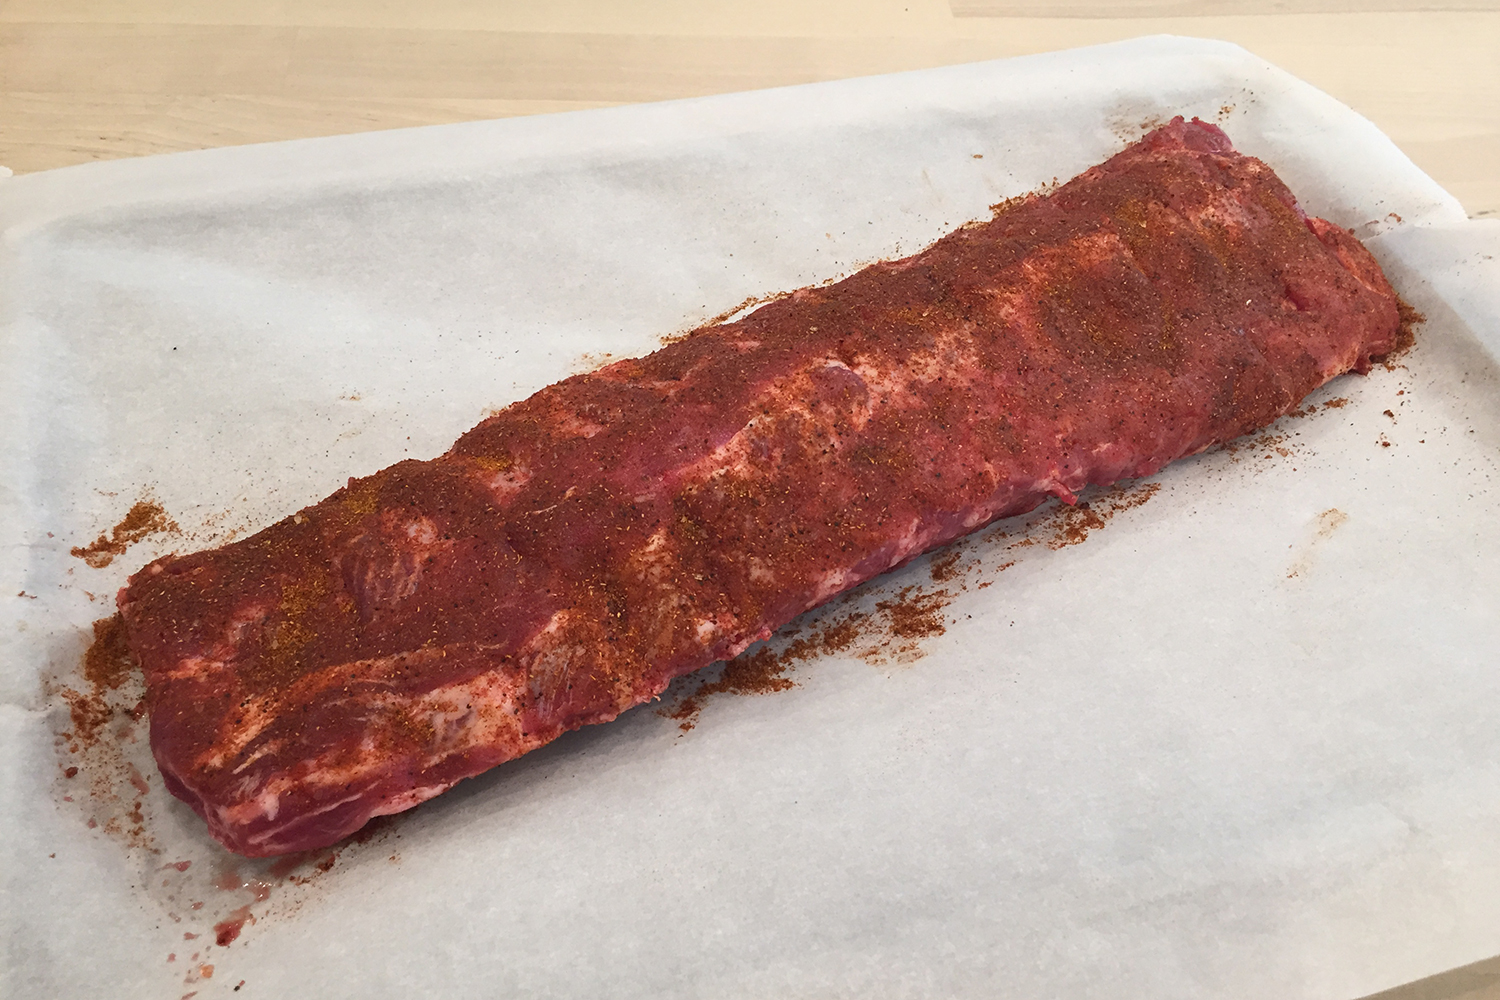
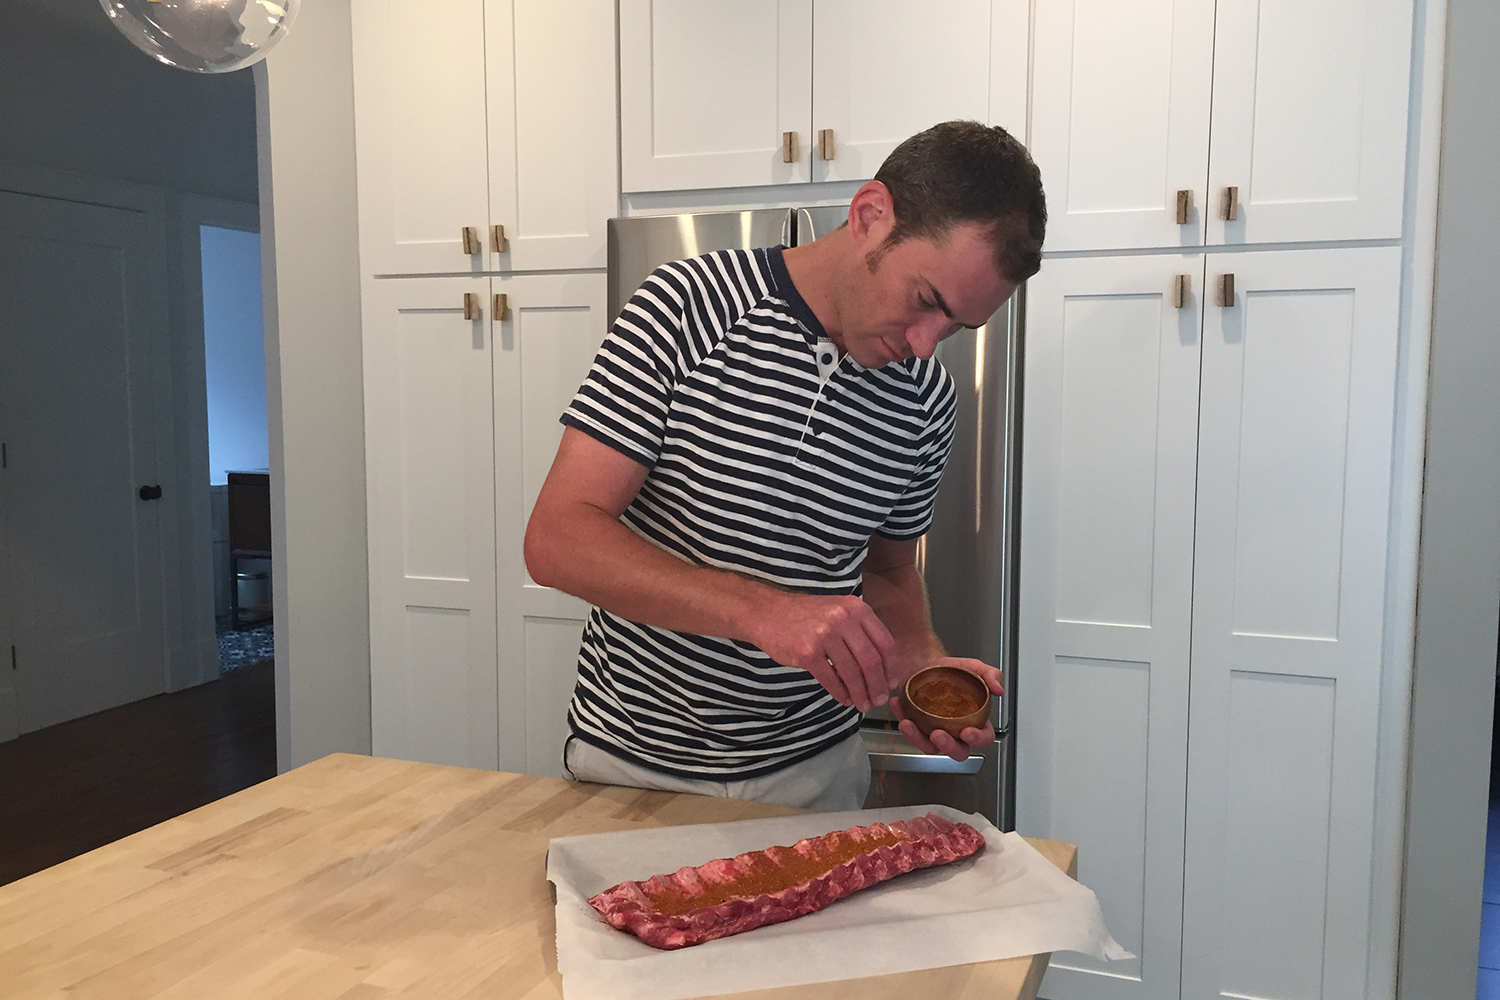
- Slather mustard (and liquid smoke, if using) over both sides of the ribs.
- Sprinkle rub all over.
- Bake the ribs for 2 hours.
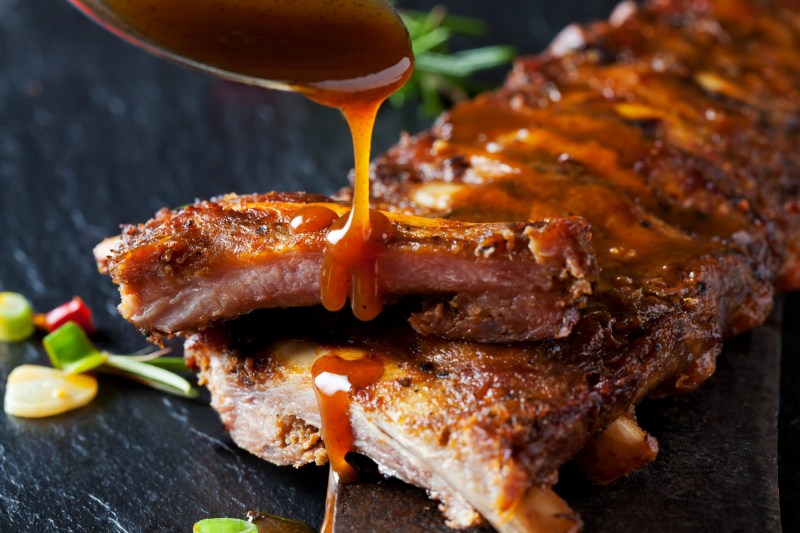
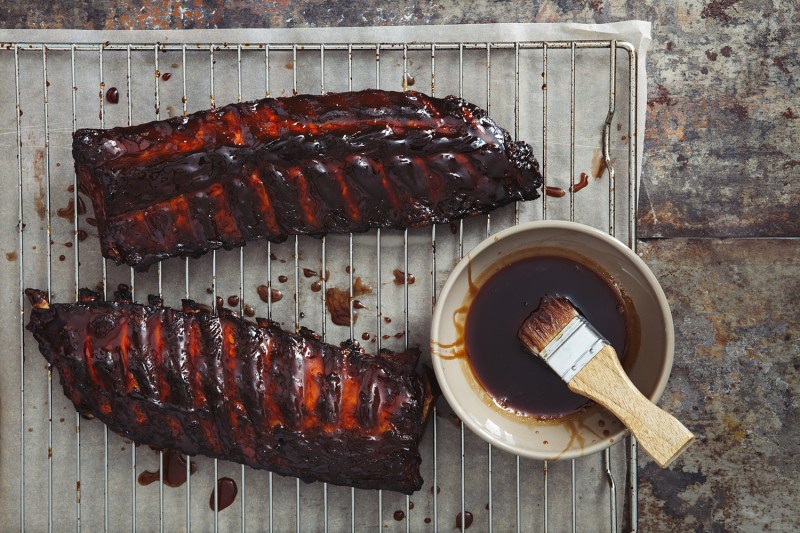
- Paint a thin layer of barbecue sauce onto both sides of the rack, then bake for another 30 minutes.
- Repeat painting of the sauce, check the internal temperature, and bake until the third hour or pull ’em out if they’re at (or past) 165 degrees Fahrenheit.
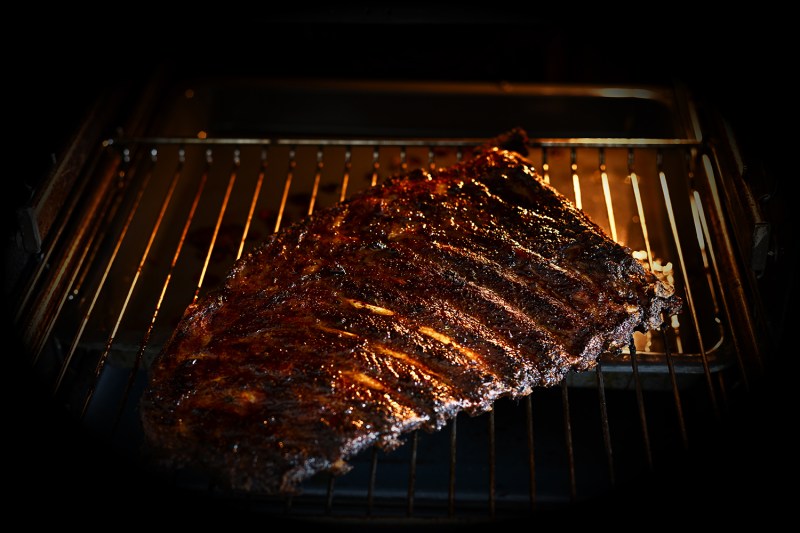
Get that charred look (and taste) with your broiler
While cooking ribs in the oven is unbelievably easy, and it produces tender, tasty ribs, baking alone can’t produce that slightly charred crust that makes ribs done on the grill so amazing.
Thankfully, there’s a method to get this look using only your oven, and it’s just as easy.
According to Once Upon a Chef, if you want to get that charred look, using your broiler at the end of the cooking time is the way to go. Simply prepare the ribs according to the above recipe, but before you put them into the 300-degree Fahrenheit oven, cover the pan tightly with foil and bake for about 2 hours. Then when the ribs are nice and tender, remove the foil, spread on some barbecue sauce, and put them under the broiler for between 2 and 4 minutes until the sauce is bubbling and just starting to darken. Don’t walk away while the ribs are under the broiler, watch them closely, because the direct heat can burn the sugar in the sauce very quickly, and burned ribs are no one’s idea of tasty.
How to cook beef spare ribs in the oven
Because spare ribs tend to be tougher than baby back ribs, and beef ribs are tougher than pork, a slower, lower heat is ideal for beef spare ribs. In this case, the magic numbers are:
- 3 1/2 hours at 285 degrees Fahrenheit
How should you prep those spare ribs prior to the slow, steady cooking? Like the pork baby backs, frankly. Don’t be afraid to go off on your own magical flavor journey, but the following recipe will work well for easy, tasty spare ribs. We get spare ribs from the grocery store when possible just because it’s easier, but for the best racks, go to a butcher.
Ingredients:
- 1 rack of spare ribs, raw and at room temperature
- Approximately 1 cup of your favorite rub
- Approximately 1 cup of your favorite barbecue sauce
- 5 tablespoons of honey mustard
- 1 tablespoon of liquid smoke (recommended)
Method:
- Preheat oven to 285 degrees Fahrenheit.
- Line a baking sheet with aluminum foil or parchment paper.
- Spread mustard (and liquid smoke) over both sides of the ribs.
- Pour rub all over.
- Bake the spare ribs for 2 hours.
- Spread a layer of barbecue sauce on both sides of the rack. Bake for another hour.
- Repeat sauce spreading, check internal heat, and bake another 30 minutes or get them out if they’re at (or past) 160 degrees Fahrenheit (160 to 170 degrees Fahrenheit is ideal).
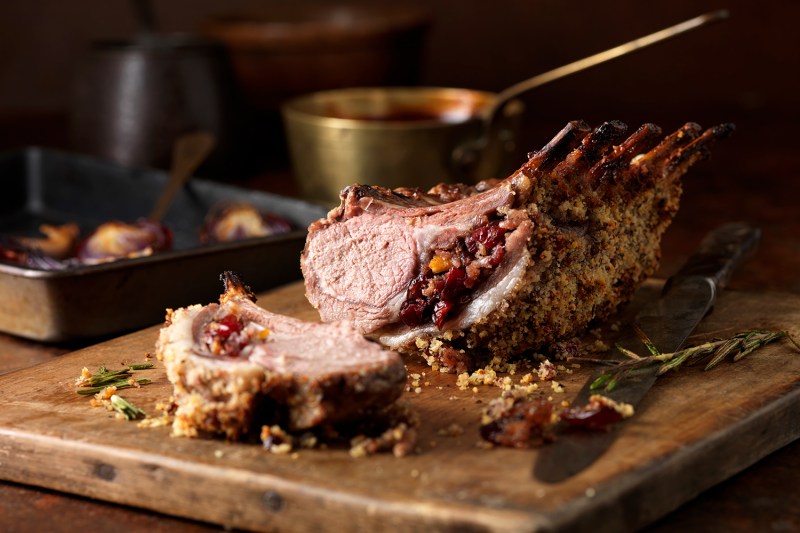
How to cook a rack of lamb in the oven
When people talk about ribs, they far too often overlook lamb. The fact is, lamb ribs can make a great entree, or they can even be carved into an excellent appetizer. A roasted rack of lamb is pretty easy to get right, too. They cook up quickly, making them a good choice when you don’t have hours of time to while away. Your active prep time will be about 15 minutes, and the cooking time and temps are:
- 30 minutes at 450 degrees Fahrenheit
(By the way, we used lamb from Superior Farms. The brand’s site has a bunch of great recipes, but ours is simpler.)
Ingredients:
- 1 rack of lamb, cold from the fridge
- 4 tablespoons of olive oil
- 2 tablespoons of garlic powder
- 2 tablespoons of rosemary, dried and ground
- 2 tablespoons of breadcrumbs
- Salt and pepper to taste
Method:
- Blend all dry ingredients in a bowl.
- Brush lamb with oil, then coat with dry ingredient mix.
- Rest rack while preheating the oven to 450 degrees Fahrenheit.
- Roast lamb for 15 minutes.
- Turn the rack over and roast for an additional 15 minutes.
- Remove from heat and let stand 10 minutes; the lamb should be at least 145 degrees Fahrenheit for medium-rare. Carve and serve.
Editors' Recommendations
- The best fried chicken recipe you will ever make
- The secret to gauging meat tenderness is easier than you think
- How to grill the steak of your dreams: An aspiring steak master’s guide
- This is the best wood for grilling and smoking, according to an expert
- How to make a Dark and Stormy, the rum-centric sibling of the Moscow Mule


